User Guide - Magento 2 Help Desk Extension
Welcome to Magehq Docs
1. Overview
Magento 2 Help Desk extension collects and processes all tickets, emails in one place. Improve customer satisfaction with fast and efficient support services, improve employee productivity by organizing and arranging work perfectly.
Extension link: Magento 2 Help Desk extension
2. How Does It Work?
2.1 Settings
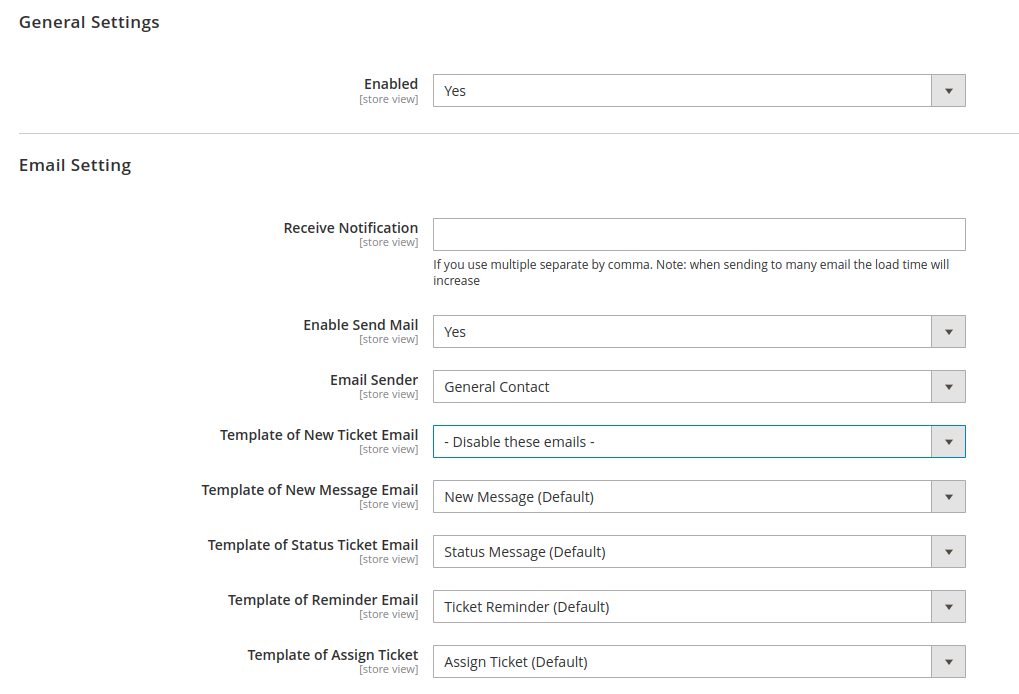
Please go to Stores ⇒ Configuration ⇒ Magehq Extensions ⇒ Help Desk.

In Enable: Choose Yes to enable the module or choose No to disable it.
Receive Notification: If you use multiple separate by comma. Note: when sending to many email the load time will increase
Enable Send Mail: Select Yes to Enable Send Mail
Email Sender: select email Sender
Template of New Ticket Email: select Template of New Ticket Email
Template of New Message Email: select Template of New Message Email
Template of Status Ticket Email: select Template of Status Ticket Email
Template of Reminder Email: select Template of Reminder Email
Template of Assign Ticket: select Template of Assign Ticket
Auto Close Ticket For, days: time auto close ticket
Auto Reminder Ticket For, days: time auto reminder ticket
2.2 Manage Ticket

2.3 View Ticket

Attachment: file image in ticket
Message: send message to customer
2.4 Manage Category

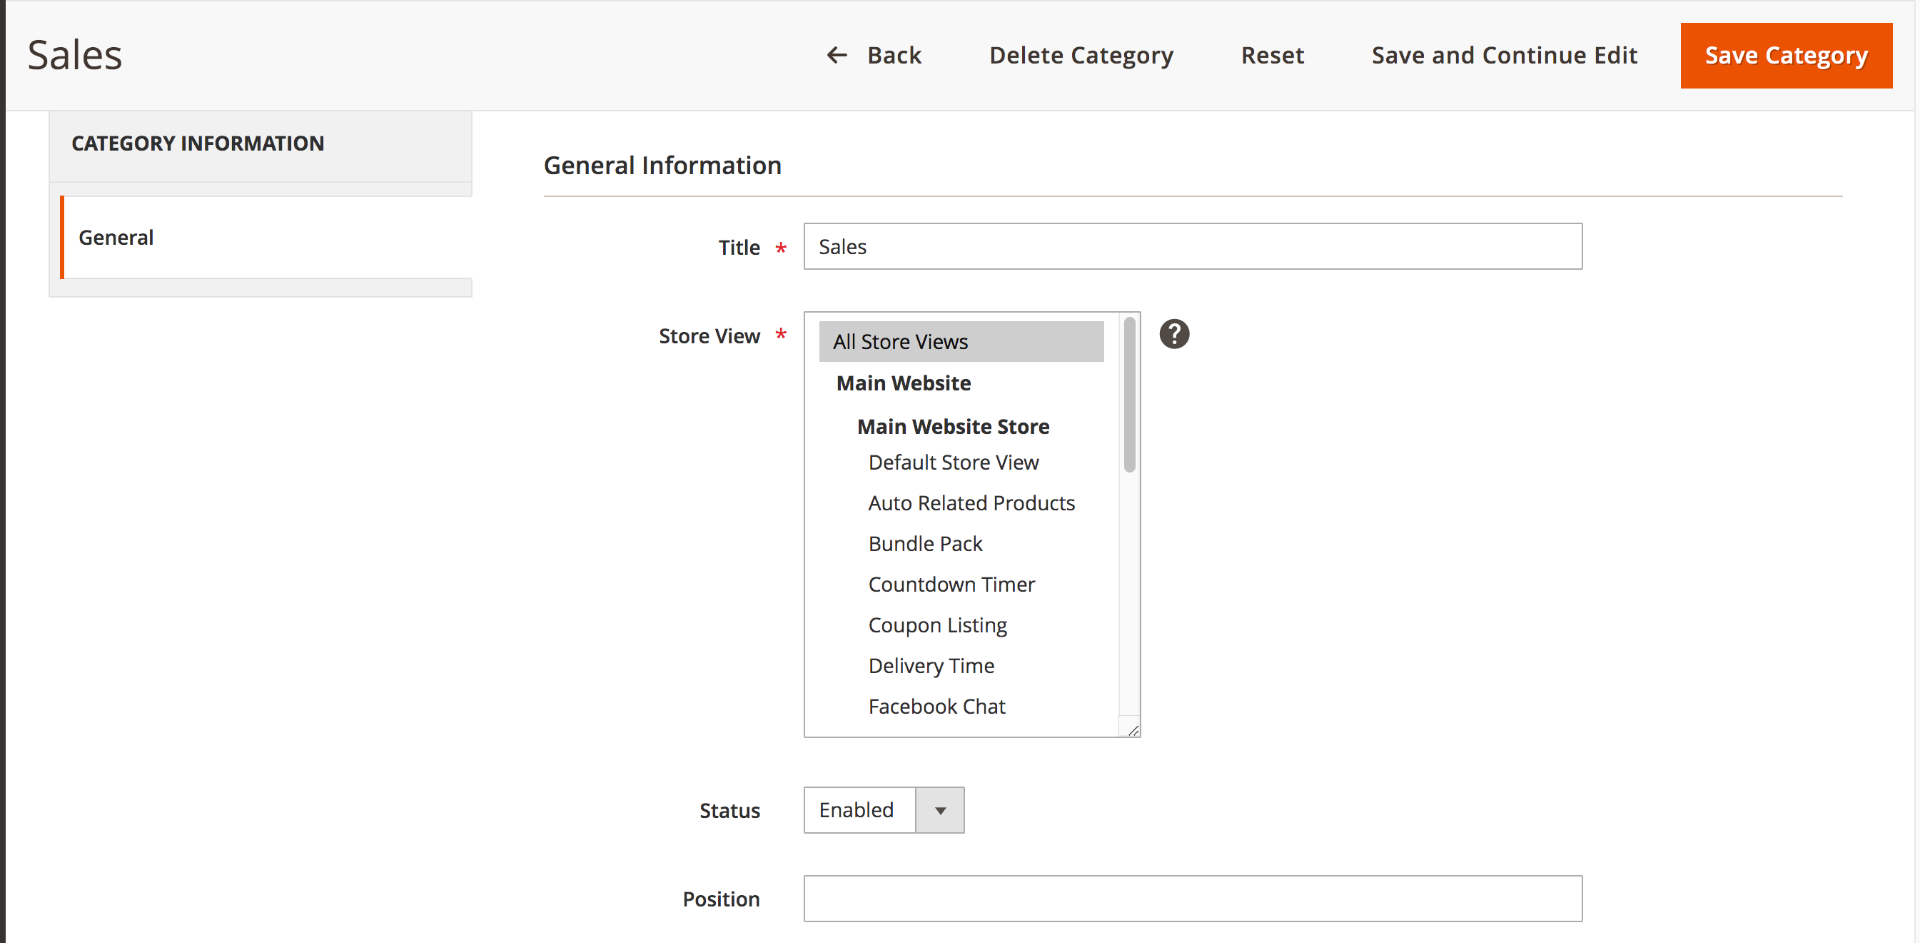
2.5 Create/View Category

Title: enter title category
Store: select store
Status: select enable or disable category
Position: enter position
2.6 Manage Department

2.7 Create/View Department

Title: enter title department
Category: select category helpdesk
Member of department: select user admin for department
2.8 Manage Permission

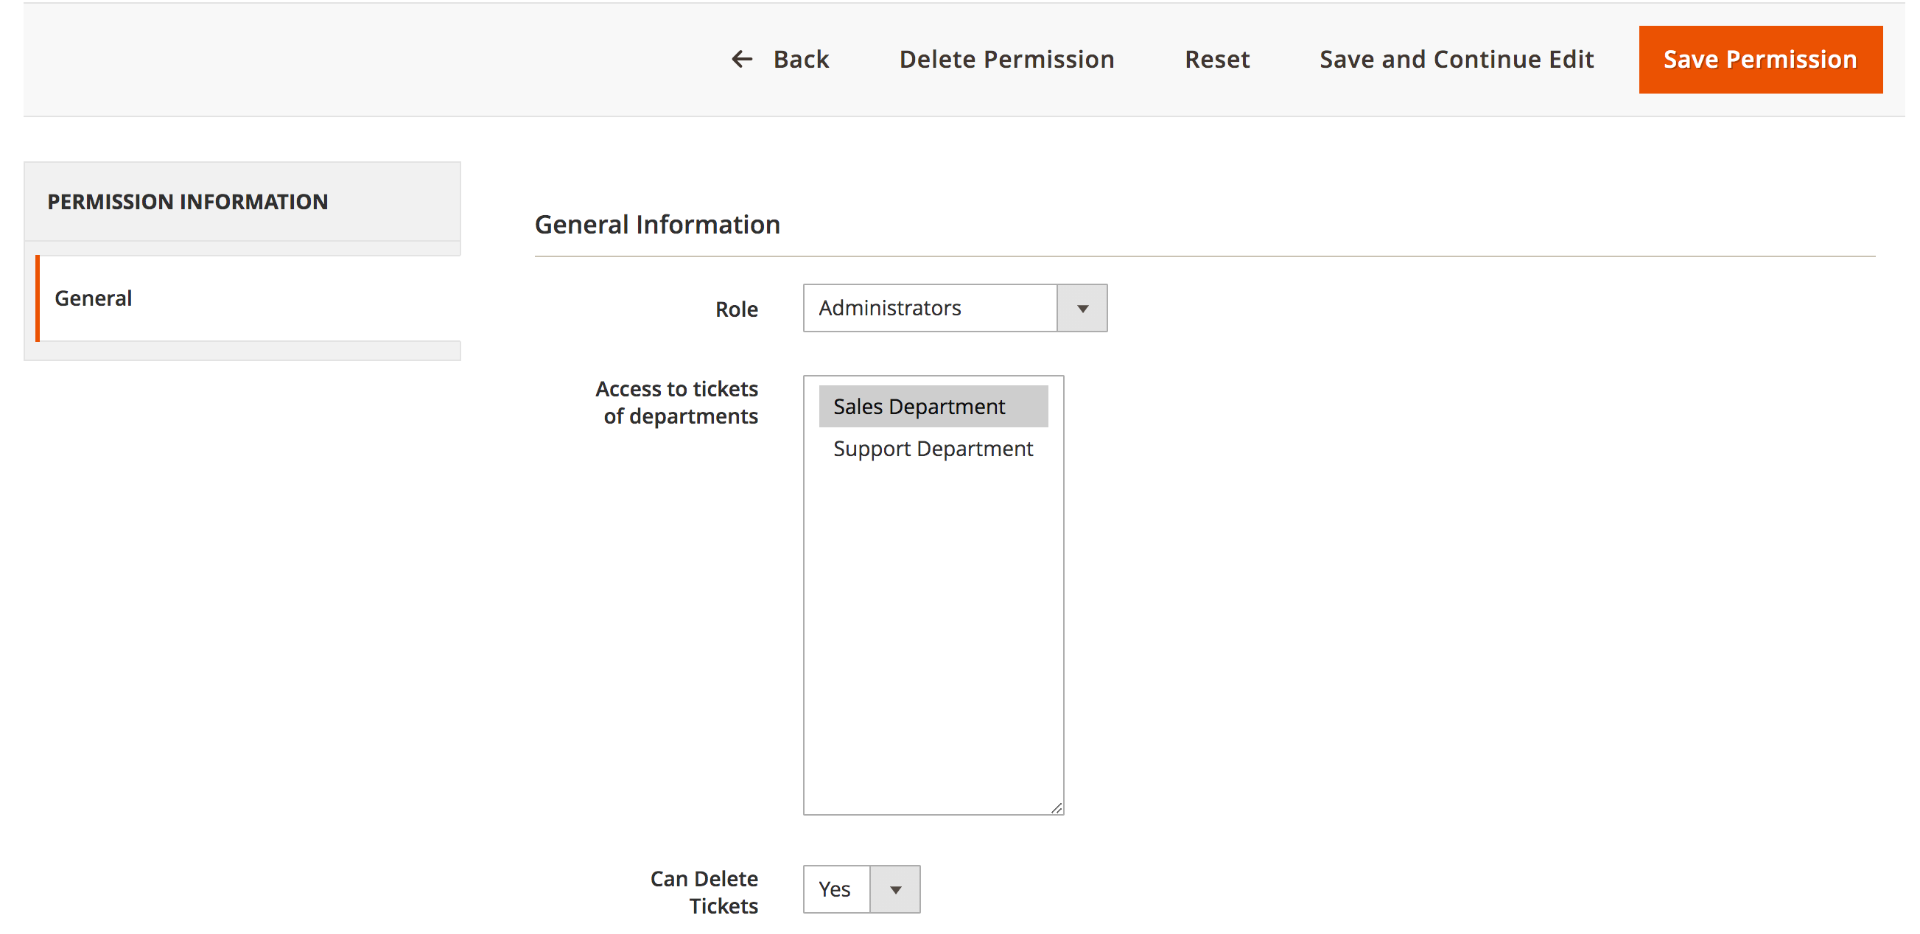
2.9 Create/View Permission

Role: select Role admin
Access to tickets of departments: select department can access ticket
Can Delete Tickets: select Yes or No
3.0 Manage Getway

- Title - the internal title of the gateway. You can use any phrase.
- Email - the email address of your mailbox
- Login - the login to your mailbox
- Password - the password to your mailbox. If you have set a two-step authentication, you need to generate a special password to apply and use instead of your regular one. Here is how it can be done for GMail.
- Is Active - whether Gateway is active. Our cron task fetches emails via a registered mailbox only when it is activated here.
- Host - the hostname of your mail server
- Folder - is a special field which forces Help Desk MX to fetch emails only from a specific folder inside the mailbox. Typically this option is used when the Help Desk shares a mailbox with some other service or extension.
- Protocol - the protocol used by your mail server (IMAP or POP3)
- Encryption - the encryption method used by your mail server
- Port - the port used by your mail server
- Fetch Frequency (minutes) - how often the help desk should fetch new emails from your mailbox
- Fetch Max - the maximum number of fetched emails per one connection to your email server
- Fetch Only X Last Emails - can be useful for some mailboxes. Leave empty to disable this feature.
- Remove emails after fetching - makes our extension remove emails after fetching them.
- Auto-assign tickets to Store View - allows you to automatically set a storeview for tickets created from emails on this Gateway. It is extremely useful for multi-stores and separating staff duties.
- Auto-assign tickets to department - allows you to automatically set tickets created for the Department from emails on this Gateway. It is extremely useful in separating staff duties.
- Notes - any additional notes.
Our extension supports the following types of encryption:
- SSL - Secure Sockets Layer, used in most public mail servers, like Gmail.
- TLS - Transport Layer Security, used in private mail servers. Our extension supports both TLS with or without certificate validation.
You will need the following setup to connect to the Gmail mailbox.
- Title:
Gmail gateway(in fact, there can be any logical name) - Email:
your_email@gmail.com - Login:
your_email@gmail.com - Password:
the password to your Gmail account - Is Active:
Yes - Host:
imap.gmail.com - Protocol:
IMAP - Encryption:
SSL - Port:
9933.1 Show on frontend

