User Guide - Magento 2 Countdown Timer Extension
Welcome to Magehq Docs
1. Overview
With the Magento 2 Countdown Timer extension, you can create a countdown timer for any campaign, on special products or offers. It boosts the store’s performance and improves the shopping experience significantly.
- Attractive countdown timer options with pre-made templates.
- Allows customizing the color, background of the available templates.
- Set up an offer time to speed up purchases.
- Set a countdown timer to display for each store view, website or customer group.
- Display countdown timer on Category Page or Product Page.
- Countdown timer position option on product page.
- Set layout information, date format, add custom text and CSS custom.
- Display countdown timer with specific conditions.
Extension link: Magento 2 Countdown Timer extension
2. How Does It Work?
2.1 Settings
Please go to Stores ⇒ Configuration ⇒ Magehq Extensions ⇒ Countdown Timer.

In Enable: Choose Yes to enable the module or choose No to disable it.
2.2 Manage Rules

- This is where the discount list is displayed.
- From Countdown Timer, admin can capture basic information of Countdown Timer such as ID, Name, Status, Customer Groups, Store View, Priority, Action.
- Action:
- Delete: Delete the information on the Countdown Timer page.
- Change Status: Change the status of the selected Countdown Timer.
- Edit: Navigate to the previous Countdown Timer Infomation page.
- In addition, admin can Filter, Change Store View, Hide / Display Columns.
2.3 New/Edit Rule

-
Title: Enter a title for Countdown Timer, this is a required field
-
Customer Group(s): Select the customer group for which Countdown Timer will be visible, you can select multiple customer groups.
-
Store View(s): Select the store in which Countdown Timer is displayed, you can select multiple stores

-
Status: Select Enable to display Countdown Timer in Frontend.
-
Display on:
- Select position to display the Countdown Timer in Frontend.
- Only show the Product View option when Apply for = Apply for product base.

- Position on Product Page: Choose the position displayed for the countdown clock
- Start Time: Set the start time for the countdown clock.
- End Time: Set the end time for the countdown clock.

- Format Date: Select the format of the countdown timer (eg. DD:HH:MM:SS, HH:MM:SS, etc.).
- Text Before Clock: Enter the text before the countdown clock.
- Text After Clock: Enter the text after the countdown clock.
- Class CSS: Name the class that you want to customize (eg: body-left).
- Custom CSS: Add all CSS you want to use to customize the class.
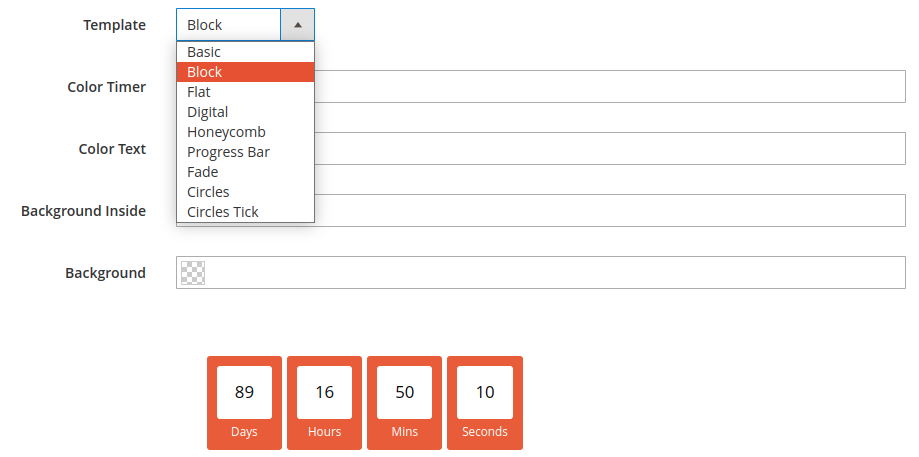
- Template: Choose the type of countdown timer.
- Background : Set the background color for clocks.

You can apply a rule to set conditions to display the countdown on your product page by using various product attributes such as SKU, Quantity, etc
● Preview product: Show the products which meet the rules in Conditions. Thus, you can check whether your products are right or not. For example: If you choose SKU as a condition, you will have to enter the product SKU like below.
2.3 Display on frontend
Position After Product Title

Position After Product Price
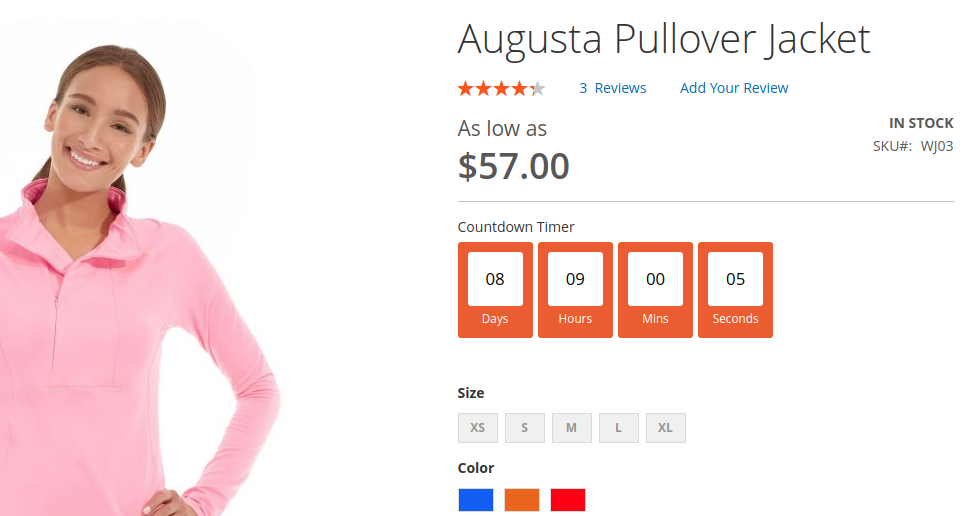
Position After Add To Cart

Position Before Product Content

Show Product List Page: (eg. Category Page)
