User Guide - Magento 2 Barcode Extension
Welcome to Magehq Docs
1. Overview
Magento 2 Barcode extension allows you to create barcodes for products, customize them as you wish and print them in PDF format for easier product handling
Extension link: Magento 2 Barcode extension
2. How Does It Work?
2.1 Settings
Please go to Stores ⇒ Configuration ⇒ Magehq Extensions ⇒ Barcode.
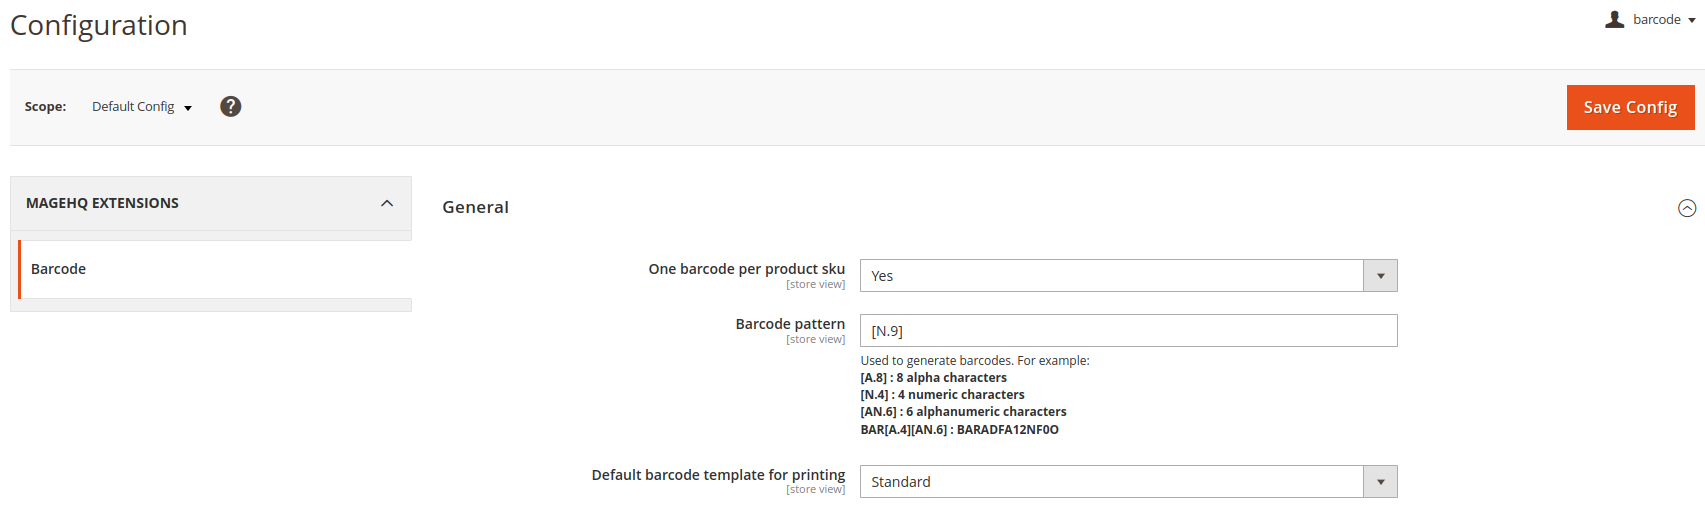
In One barcode per product sku: If you set “One barcode per product sku” as “Yes”, then the system will allow you to generate one barcode for one product sku only.
In Barcode pattern: Admin can configure the barcode pattern to generate. Barcodes generated will be saved in Barcode listing page & Barcode created history.
In Default barcode template for printing: select default template Standard or A4 or Jewelry
2.2 Barcode listing
Barcode listing is a view to display all barcodes of all products saved in Inventory Management. It contains Barcode, SKU, Supplier and Purchased Time.
From this screen, admin can easily Import barcode or Generate Barcode with 2 buttons on the top right
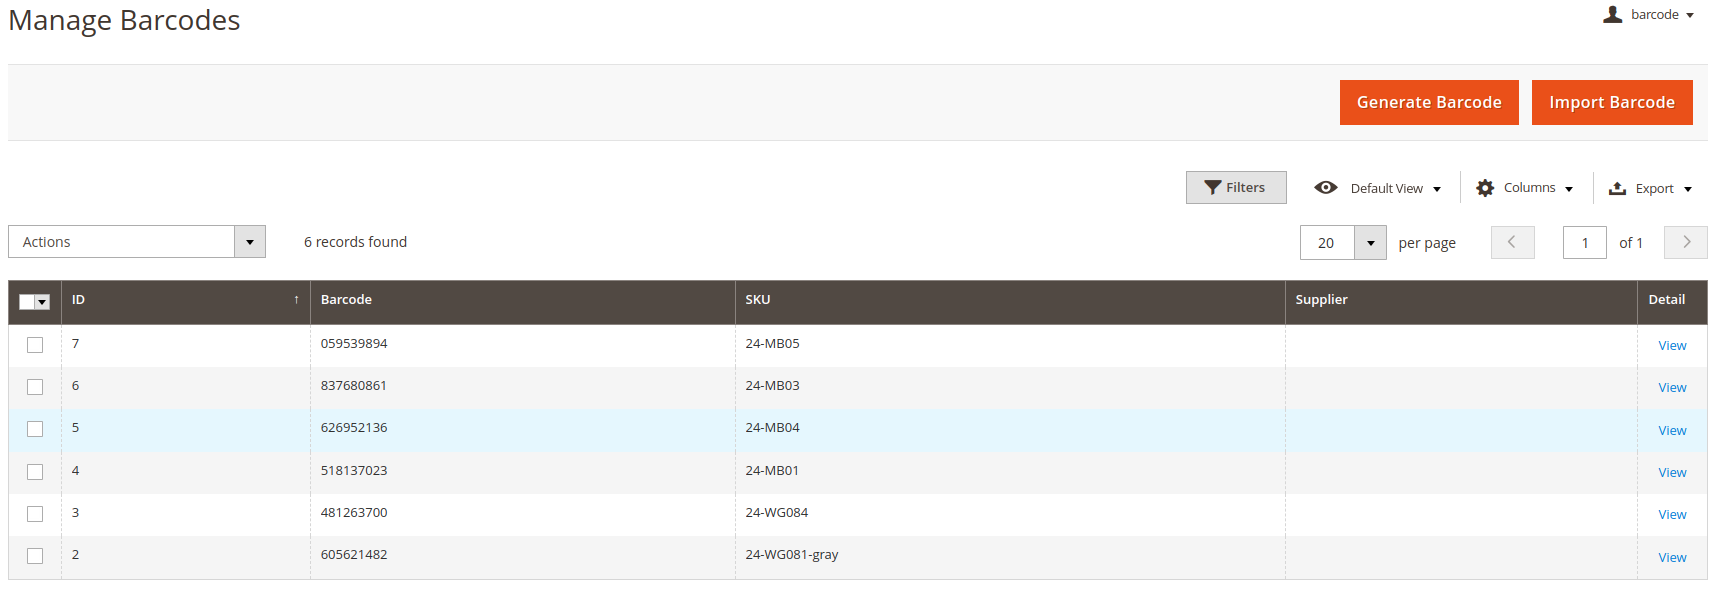
Admin can also view details of each product and barcode.
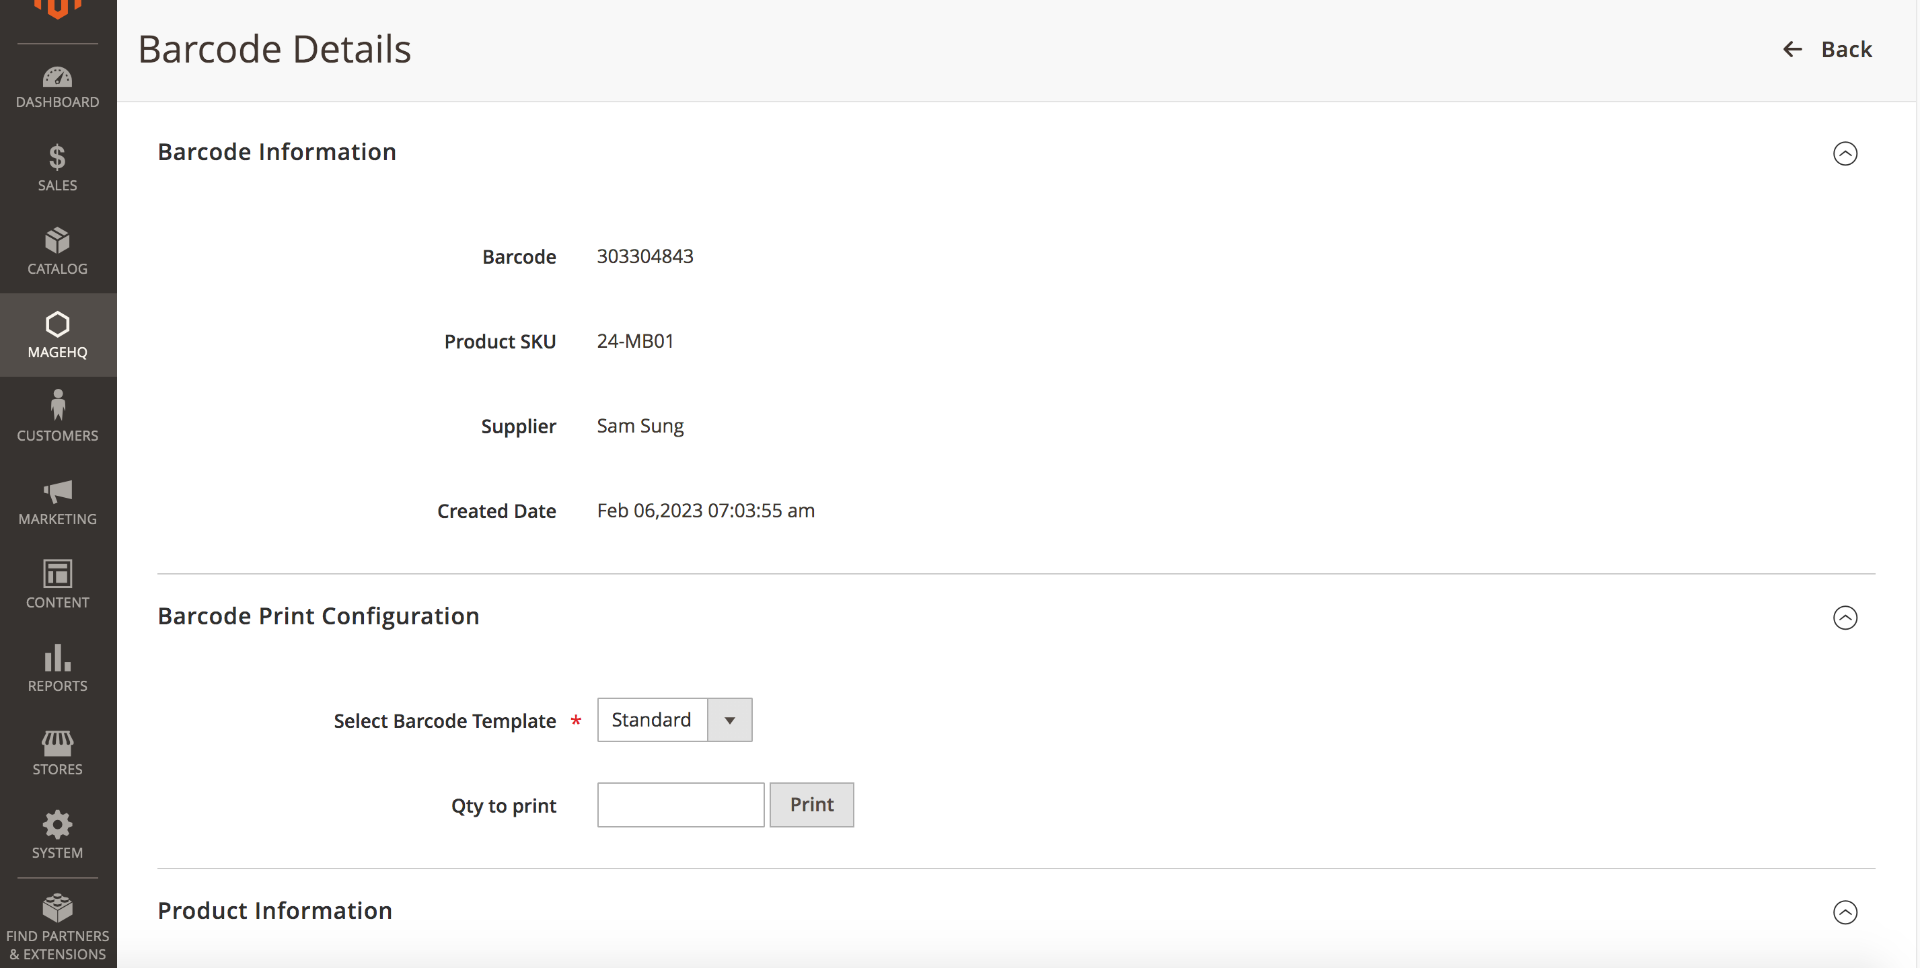
From barcode detailed page, admin can configure barcode printing and print barcode directly. Product information is shown including Image, name, price and its availability in each warehouse.
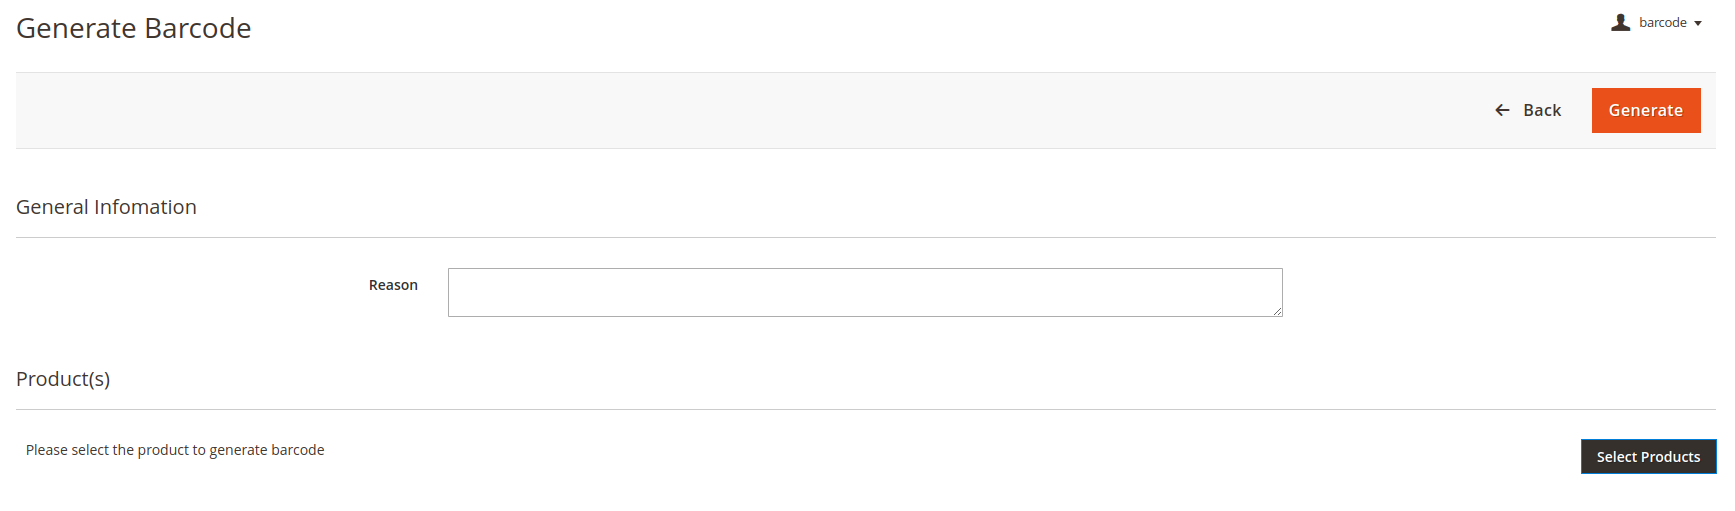
2.3. Generate barcode
Go to Generate Barcodes tab. From here you can select the product that you want to generate barcode, fill in the Supplier (optional) then generate.
- If you set “One barcode per product sku” as “No”, then it opens up 2 options to generate barcode when you go to Generate Barcodes tab.
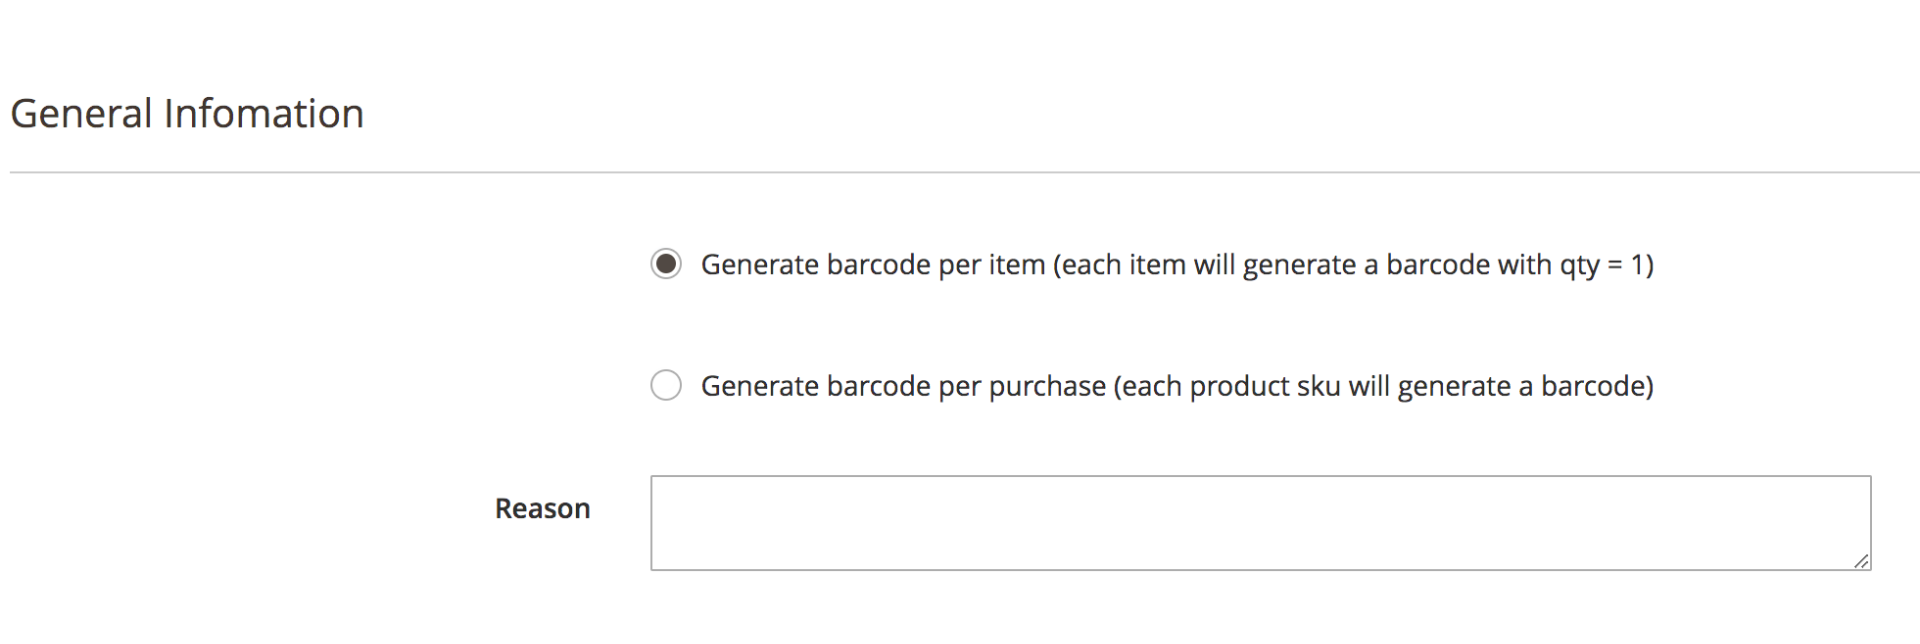
These 2 options are: Generate barcode per item or Generate barcode per purchase.
“Generate barcode per item” means each item will have its own identified barcode although they have the same SKU.
“Generate barcode per purchase” means items will be identified by the time it is purchased. Although you take 10 items with same SKU in one time purchasing from Barcode Management for Magento 2 v.1.0.0 6 supplier, these 10 items will have the same barcode. But in another time of purchase, they will have different barcode.
After selecting the option you want to proceed with, you can continue selecting product, fill the product Qty. , supplier and purchased time (optional) then generate.
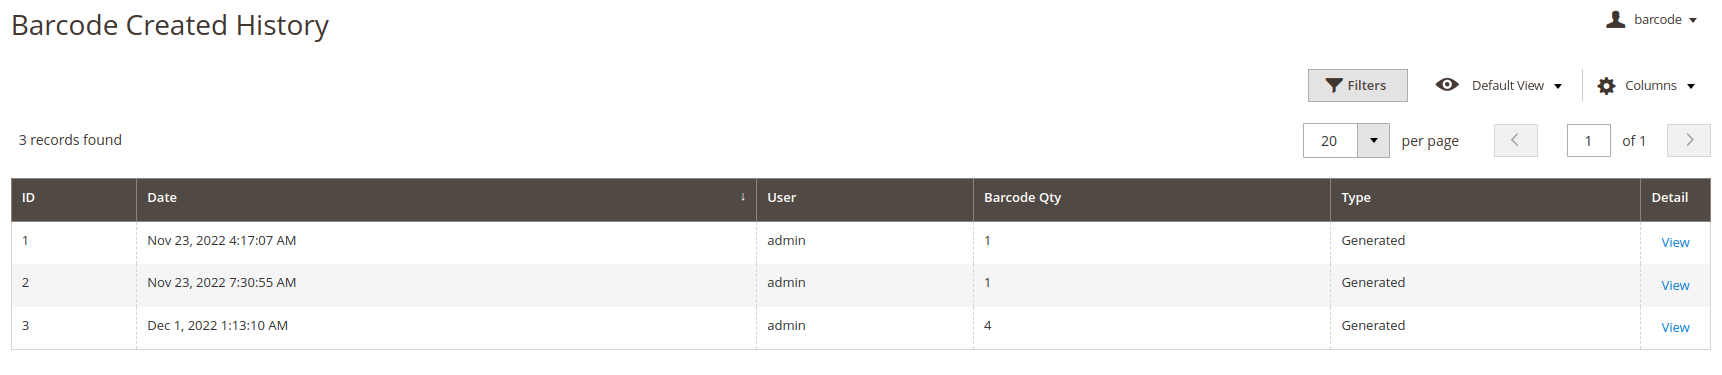
Admin can configure the barcode pattern to generate. Barcodes generated will be saved in Barcode listing page & Barcode created history.
2.4. Import barcode
When your products already have a pre-generated barcode, you will not need to use Generate barcode feature. Instead, you can import barcode directly into the system using Import barcode feature of Inventory Management.
The system provides a sample import file including SKU, Barcode, Qty. and Supplier & Purchase time (optional).
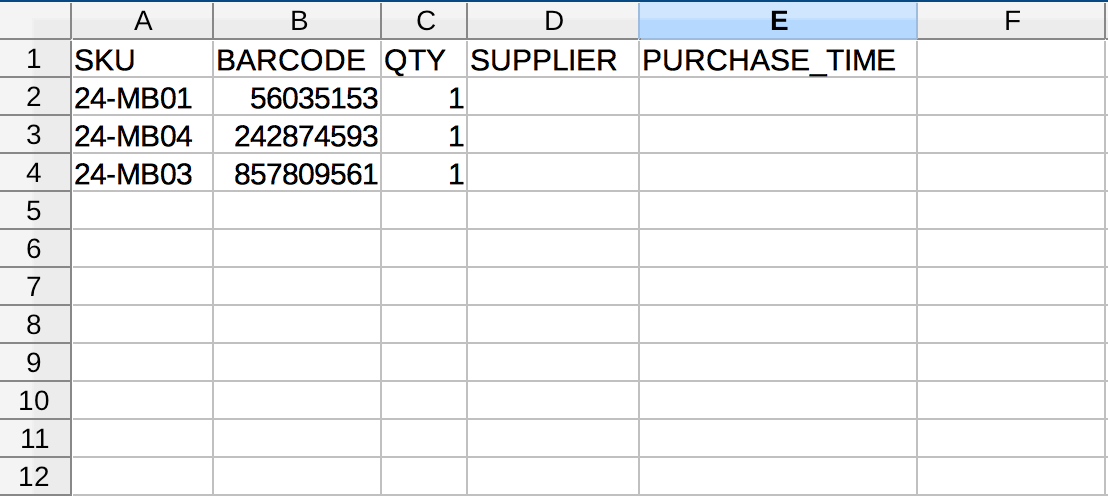
After preparing the file, now you can upload the file, fill the reason and start to Import.
2.5. Import barcode
You can create your own barcode template by adding new template. There are also 3 most used templates as default templates in the extension: A4, jewelry and standard for you to select.
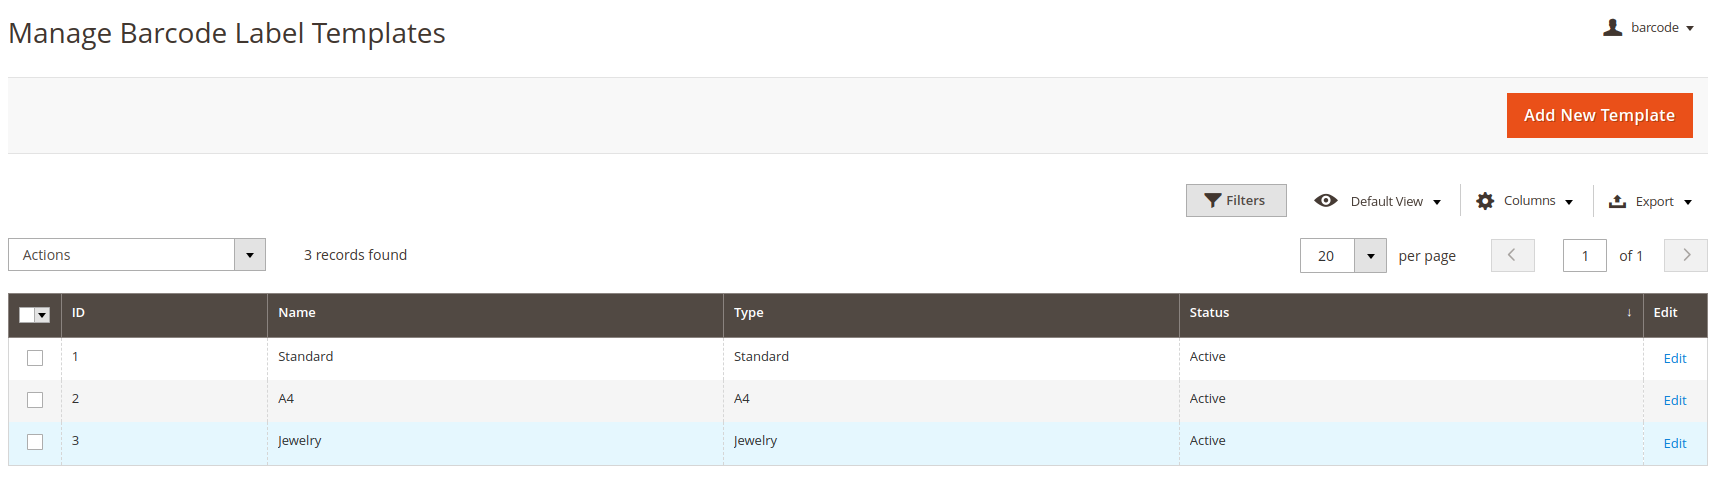
You can configure paper width and height, label width and height, font size…and preview the template before saving.
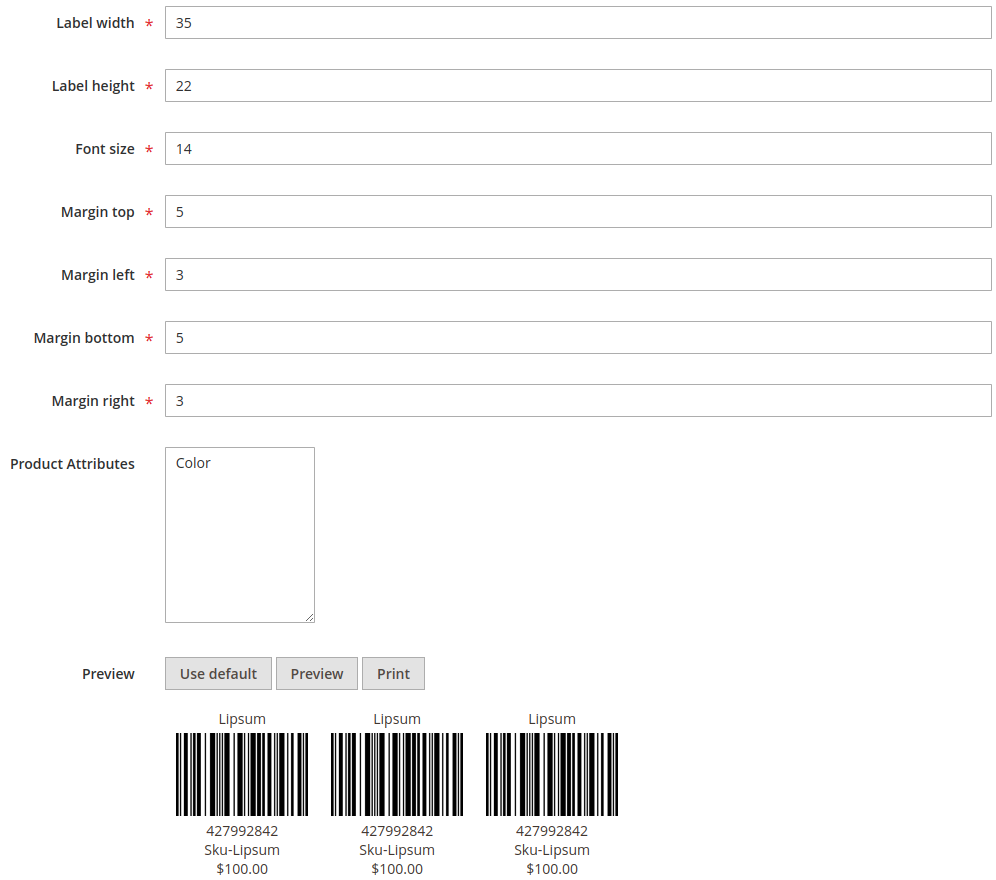
2.5. Print barcode
In Barcode configuration, admin can select the barcode template from the templates created before to print.
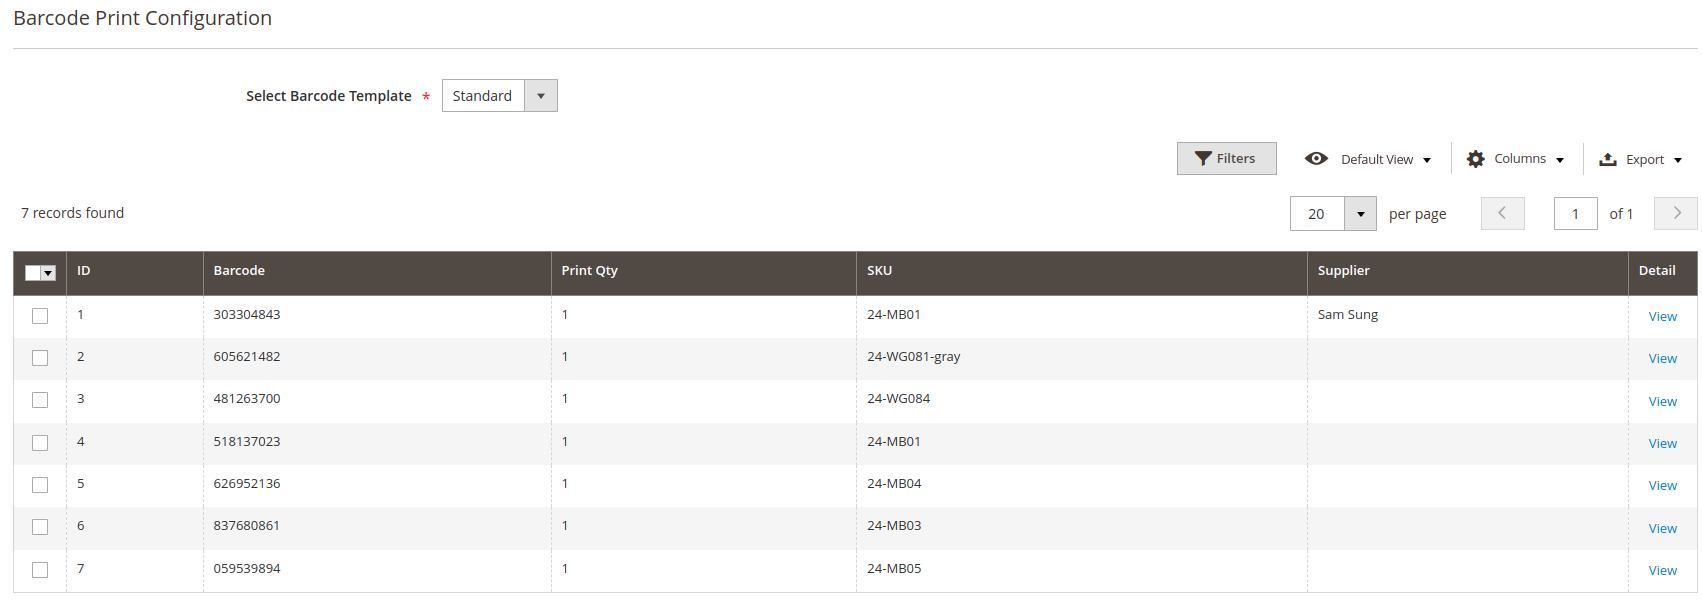
Admin can select multiple barcodes to print at once. Or click to View under Details column to print one barcode multiple times.
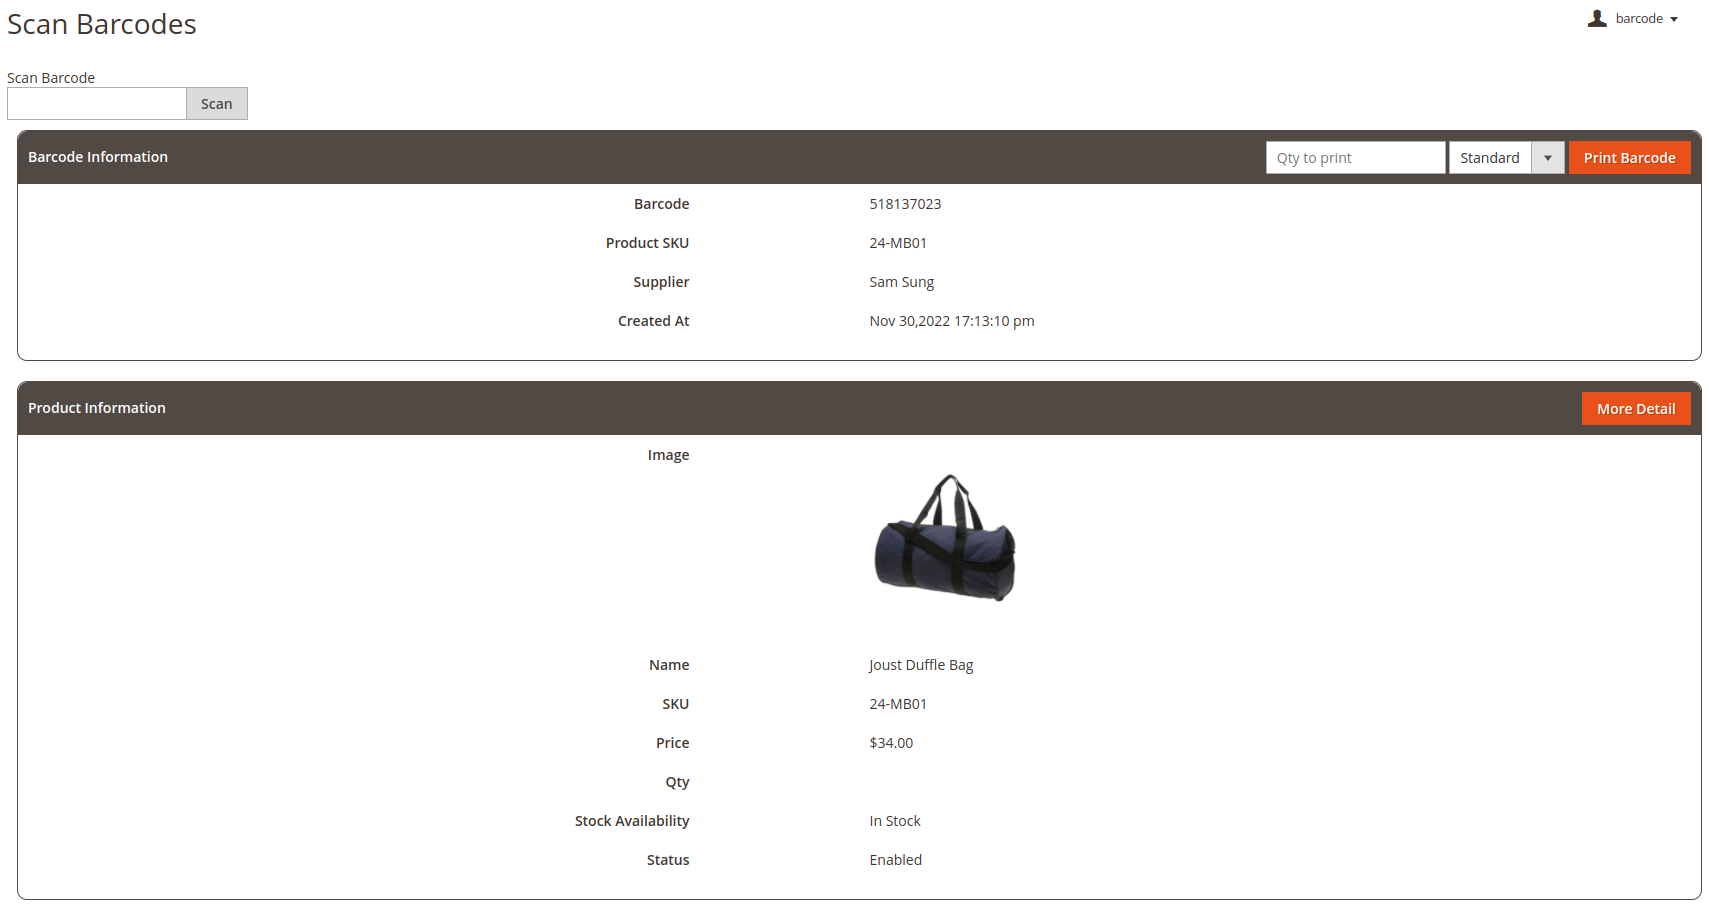
2.6. Scan barcode
In Inventory Management extension, you need to use a Barcode scanner which is able to connect with your computer. Then you can scan to read product information or update stock Qty. when doing Stock taking (Stock taking is a feature available in Inventory Management extension).
- When going to Scan Barcode, you can read barcode information and product information.
- In Stock-taking, there are 5 steps: 1- General information, 2-Prepare product, 3-Stock take, 4-Complete data entry, 5-Complete Stock take. Scanning can be applied at step 2: Prepare product before Stock take. From this step, there is an option to import products and sample files are provided. You can use a barcode scanner to scan product with Qty. into an excel/csv file. Then upload the file with Qty. counted by barcode scanner into the system to update Stock take Qty. About detailed steps of Physical Stock taking, please refer to Inventory Management user guide.