User Guide - Magento 2 Store Credit Extension
Welcome to Magehq Docs
1. Overview
With Magento 2 Store Credit extension, the purchase and refund process is simpler and quicker, they can use store credit to pay or buy products at a lower price. Or, the store can refund the customer using the store's credit.
Extension link: Magento 2 Store Credit extension
2. How Does It Work?
2.1 Settings
Please go to Stores ⇒ Configuration ⇒ Magehq Extensions ⇒ Store Credit.

In Enable, choose Yes to enable the extension, or No to disable it.
In Allow sending credit: If you choose Yes, Store Credit is enabled on your site
In Groups can use credit: If you choose General, Only General Customers can use credit

In Apply Customer Credit: If you choose After tax, Apply Customer credit discount to Customer’s order value after tax calculated.
In Shipping Fee: If you choose No, Credit balance cannot be used to pay for Shipping Fee

Adjust time for Customer credit reports on total used and total received credit
Style Configuration tab: on this tab, you will be able to change background and color of Title
2.2 Manage Customers Using Credit
Go to Magehq > Store Credit > Manage Customers Using Credit

This page shows a list of all Customers using credit and their information such as name, email, credit balance, telephone, etc.
In order to view more details about a Customer, you can click on the Edit link in the Action column.
Then, you will be navigated to the Customer Information page. By selecting Store Credit tab, you can view all of that Customer’s transaction history and credit balance:

Besides, you can change the Customer’s credit balance by entering an integer (a positive or negative number) and a comment in text fields as below:

Our module will auto send email to Customer to announce about this transaction if you tick on Send email to customer checkbox. The email will be sent to the customer as bellow:

2.3 Manage Credit Products
Go to Magehq > Store Credit > Manage Credit Products
Then the Credit Product Manager page will be shown:

This page shows you all credit products with a lot of information such as product ID, name, SKU, quantity, status, etc.
In order to add a new credit product, you can click on the Add Credit Product button on the right top of the page.
You can add a credit product just in a similar way to adding a normal product. You should pay attention to these following tabs:

In this tab, you can configure the value of the credit product. There are three types of credit products including fixed value, range of values and drop-down value
In this tab, by default, our module sets up the field Manage Stock as Yes. It means that you need to manage the quantity of credit products.
2.4 Credit Transactions
Go to Magehq > Store Credit > Manage Credit Transactions
Then the Credit Transactions page will be shown:
![]()
This page shows all credit-related transactions with a lot of information such as type, detail, customer name/email, added/deducted credit, credit balance after transaction.
You can search any transaction by using filter boxes in each column.
If you click on a Customer’s email, you will be navigated to the Customer Information page.
2.5 Credit Report Charts
Go to Magehq > Store Credit > Customer Credit Report
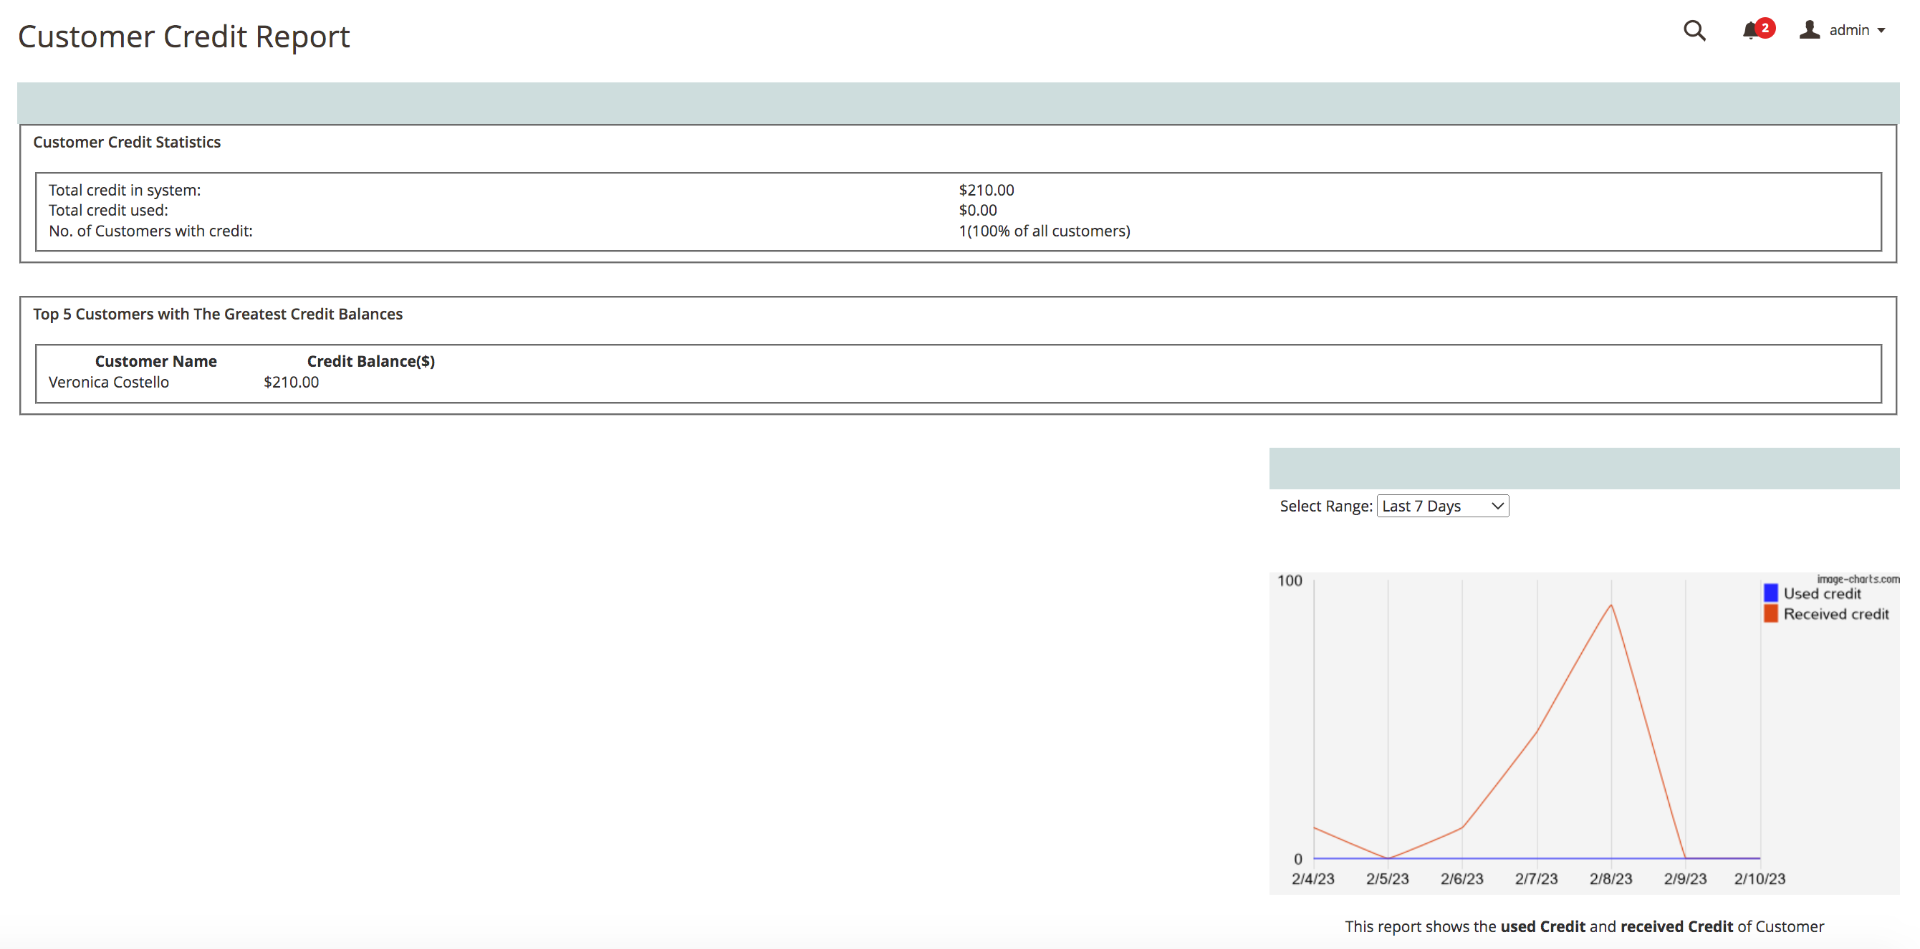
This page can be divided into two main sections including Life-time Reports and Period-of-time Report Charts.
- Life-time Reports: There are 2 types of reports.
- Customer Credit Statistics with the total credit, the total spent credit and the number of Customers with credit in your system.
- Top 5 Customers with The Greatest Credit Balances with their names and current balances in your system.
- Period-of-time Report Charts: This chart shows you the total spent credit and received credit of all Customers per day in your chosen time range such as last 24 hours, last 7 days, current month, etc.
2.5 Show on frontend


